How do I Add a New Banner?
After the FrontOffice layout, a wireframe is designed, which assigns a position to all of the established banner zones that have to be displayed on the website and their location on it. Each banner, depending on its position and objective, will have certain size and type requirements. In these lines we will explain how to create the banner in the BackOffice, this is, how it is uploaded to the BackOffice and how it is assigned to a position so that later it appears on the web.
A banner is created clicking the "+ NEW BANNER" icon on the top left of the window.
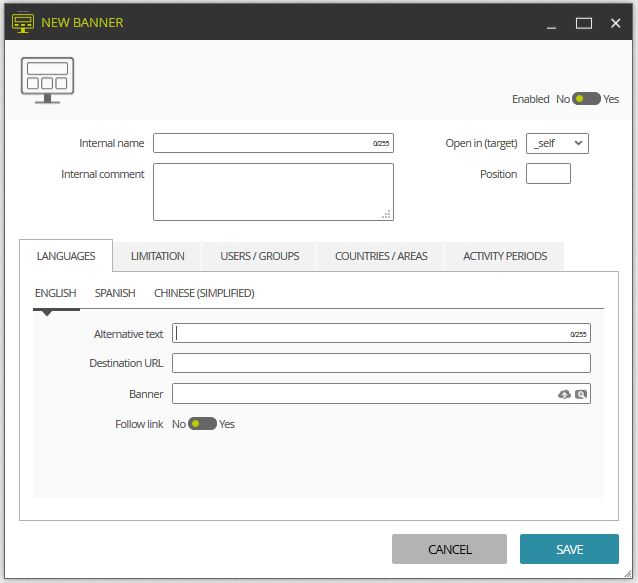
When creating a banner, we have to fill in the following:
Enabled: It indicates whether the banner is visible or not.
Internal name (compulsory): The banner’s name, only visible in the BackOffice.
Open in (target): It defines the link behavior, in case the banner has a link in it.
 In general, if we need the link to open in a new tab or a new window (recommended for ecommerce’s external links) we have to select _blank, and if we need the link to open in the same window or the same tab (recommended when it is a link to a page inside the ecommerce), we have to select _self.
Position: It defines the position (a number) that symbolizes the location in the FrontOffice. The different positions are established during the FrontOffice design. Depending on the number that is assigned here, the banner will appear in a location or in another.
There is more configurable information in the tabs at the bottom of the window. Below there is a brief explanation of what is in each tab.
Languages:
Alternative text: Brief text describing the banner. It is not compulsory to fill it in but it is highly recommended.
Destination URL: Address to which the banner must link. You don’t have to fill it in if the banner is not a link.
Banner: The image location. This location can be external to the ecommerce (hosted in a CDN) or internal. In that case, we can use the icons to browse, preview or upload the image.
Limitation: We have the option to enable or disable a series of counters that allow limiting the display of the banners to a certain number of times.
Hit counter: It indicates how many times the banner has been displayed. It can be changed to indicate the initial number of the counter.
Click counter: It indicates how many times the banner has been clicked (people who has followed to the website it is linking). It can be changed to indicate the initial number of the counter.
Limit: Here we define if limit is by hits, by clicks or if the banner does not have limits. In this case, enabling the limits is only useful to view the counter data (how many times it has been displayed or clicked).
Limited to: If we select one of the two limits, this field will appear, which allows defining the number of actions that will be available (hits or clicks). Once this number is reached, the banner will stop being displayed.
The rest of the tabs are filters to define this banner segmentation (see Use of filters for segmentation).